lovelybike3

  • Subscribe to our RSS feed.
  • Twitter
  • StumbleUpon
  • Reddit
  • Facebook
  • Digg
Showing posts with label DIY. Show all posts

Monday, October 19, 2009

Pinstriping Lugs on Your Bicycle

Posted on 8:50 AM by dvdsvdsdv
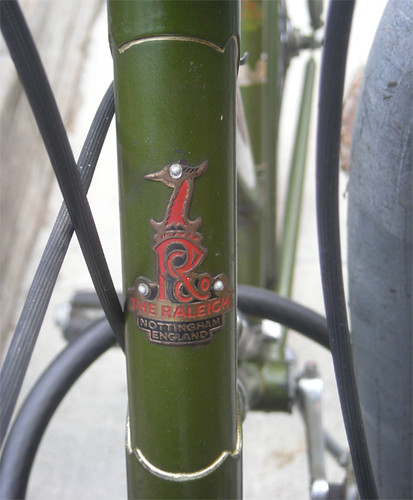
You may have noticed that on some bicycles, the edges of the lugs are attractively outlined in gold or in a contrasting colour. This treatment is called "pinstriping" and is done by hand after the bicycle's frame is painted. I like the look very much and decided to try it on my Raleigh Lady's Sport, in preparation for a more serious project. I was nervous, but it turned out to be easier than I expected. If you want to give it a try yourself, here is how:

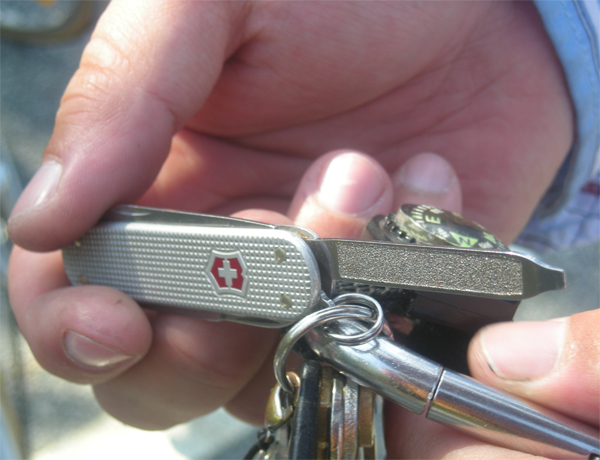
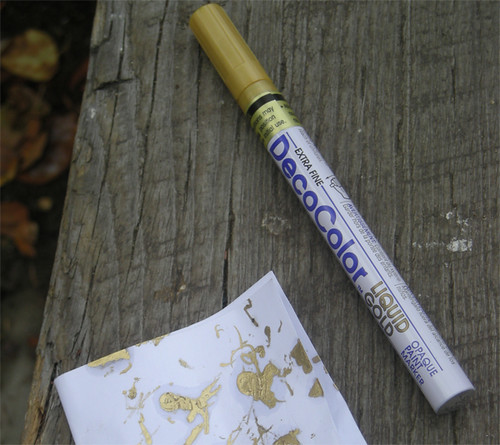
To go the truly professional route, you will need enamel paint and a pinstriping brush in the smallest size available. Having said that, I do not think these tools are necessary unless you are an experienced professional and are pinstriping a $3,000 frame with super-intricate lugwork. The enamel method can be difficult and messy, plus enamel paint contains led. Instead, I recommend a paint pen. Even professionals use these for simple projects. Several manufacturers make quality paint pens that are suitable for pinstriping bicycle frames, including Sharpie and DecoColor. Make sure the paint pen is oil-based. The label should explicitly state that it will leave permanent marks on metal surfaces. The size should be "extra fine". The price is usually in the $2.00 - $4.00 USD range.

The paint pen needs to be started by pressing down on the nib and pumping it several times - something best done on a piece of paper. When the paint flows through the pen slowly and evenly, you can begin.

Before starting the process, it is a good idea to clean the edges around the lugs and wipe them dry. Otherwise, your paint pen may get clogged with dust and grime. Once the area is prepared, simply begin to trace around the lugs with the paint pen, at a slow and even pace.

If the pen skips over a spot, go back and carefully re-trace that spot. If your hand shakes and you make an uneven line, or if the paint smears, wipe it off quickly with your fingertip or fingernail before it dries.

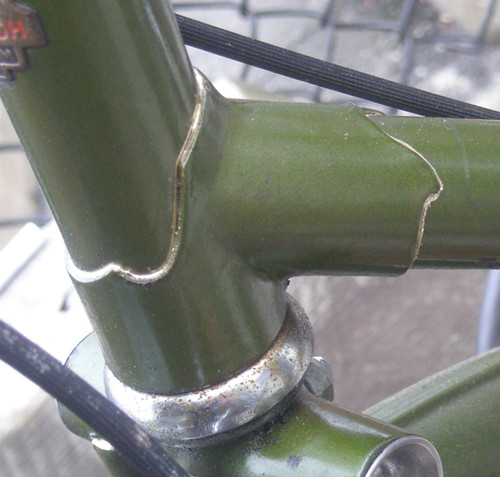
Once the paint dries, the marks you have made will be water resistant. If you notice a mistake after that happens, you can still get rid of it by carefully scraping the paint marks off with an exacto knife or a razor blade.

One issue you might encounter with rougher lugwork, is jagged edges. The lugs on my Raleigh Lady's Sports are quite crudely finished, and as you can see above, it can be difficult to make smooth outlines when the edge itself is crooked. But don't worry about that too much; these little details aren't noticeable unless you really examine the lugs up close. And I can assure you that the pinstriping on standard production vintage bikes is just as messy: Whoever outlined the lugs on my Motobecane at the factory did a sloppier job than my DIY.

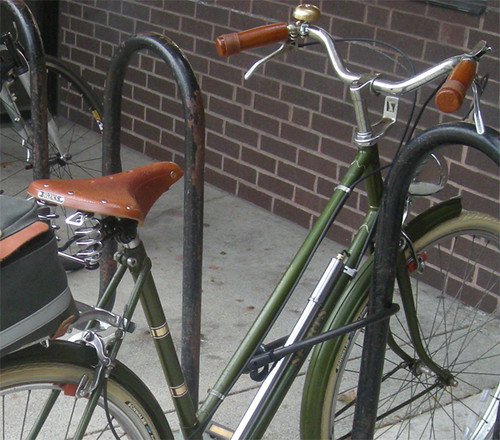
So really, don't be afraid to go for it. If you have an old bicycle you'd like to spruce up, pick up a paint pen and give it some nice lug accents.
Read More
Posted in DIY, Lucy 3-Speed, lugs, Raleigh | No comments

Sunday, October 4, 2009

Indoor Bike Activities

Posted on 7:12 PM by dvdsvdsdv
Now that it's getting colder out, it's time for some indoor bike activities.

Like wrapping and shellacking handlebars. These are the new Nitto Noodle bars on the Co-Habitant's roadbike. We have wrapped and shellacked bars so often at this point, that it's become second nature. He is the wrapper. I am the shellacker. It is satisfying to smear the amber shellac onto that pristine white tape and watch it transform into a warm caramel colour. Makes me think of candy apples.

And in case you are wondering, yes those are reindeer pajama bottoms. Très chic, non?
Read More
Posted in DIY, Motobecane | No comments

Wednesday, September 30, 2009

Derailleur Adjustment: an Illustrated Guide

Posted on 6:50 AM by dvdsvdsdv
Thank you once again everybody for the advice on how to adjust a derailleur. I am pleased to announce, that with your help, it is done.

To recap the problem I was having: When downshifting to the lowest gear, there was nothing stopping the chain from going past it and slipping off the cog. Here is how we corrected this:

Mechanic

Assistant Mechanic

The all-important tool

The derailleur. This is a rear SunTour Vx derailleur from the late 1970s. Note the two screws on the left.

A side view of the screws.

And here they are close up. Notice the letters "L" and "H" next to the screws. The "L" indicates low gear (the largest cog). The "H" indicates high gear (smallest cog). To stop the chain from going past the largest cog when downshifting into the lowest gear, tighten the "L" screw.

Here is the screw, being tightened. Conversely, if you find that the chain does not travel sufficiently to reach the largest cog when shifting to your lowest gear, you need to loosen this screw a bit. And if you are having this problem when upshifting to the highest gear, simply do the same thing to the "H" screw.

A close-up of the procedure. This takes very little time.

After the adjustment, test the derailleur: first by manually spinning the pedals as you shift, then by test-riding the bike.

Here I am, having happily shifted into the lowest gear without the chain coming off.

All done, and ready for the steepest hills. A big Thank You again to dukiebiddle, cyclemaniac, somervillain, and all the others who kindly offered advice and posted links. Your support is very much appreciated.

Some classic derailleur adjustment instructions, using more conventional tools:
. Sheldon Brown's thorough article on "derailler" adjustment
. The Bicycle Tutor's instructions and video
Read More
Posted in DIY, Motobecane, tools | No comments

Saturday, August 15, 2009

Adventures with Twine

Posted on 7:44 AM by dvdsvdsdv
The most typical use of twine on a bicycle, is to secure the inner edges of handlebar tape. Normally, bar tape is secured with black electrical tape and left as is, but I find that this looks unfinished. With twine, the handlebars will look more appealing and the tape will be more securely attached.

I use cooking twine, which is softer to the touch than industrial twine. It is white in its untreated state and turns caramel-brown when amber shellac is applied.

After wrapping your bar tape and securing the inner edges with electrical tape, the twining can begin.

First apply a layer of clear double-sided tape over the electrical tape.

Cut a half-armlength of twine.

Apply the twine over the double-sided tape by simply wrapping it around the handlebar and placing it down neatly onto the sticky surface of the tape. There should be no gaps and no overlap.

When the surface of the double-sided tape is covered with twine, cut the remainder off. There is no need to secure the twine, since it is stuck to the double-sided tape. This will provide a good temporary hold until shellac is applied.

Using a paintbrush or a sponge brush, cover the twined area with amber shellac following the same principles described here.

After three layers of shellac, the twine should feel completely solid and have a deep amber colour to it, at which point the project is finished. Your bar tape will be more secure than ever and will look great.

If you've finished twining your bars and still crave more, do not despair: There are lots of other places on a bicycle where twine can be used. I twined the chrome connector piece between the rack and the rear stays on my Pashley, because I was not satisfied with how the expanse of chrome stood out in an otherwise green and black colour-scheme. The dark amber twine softened that area up, and integrated it nicely with the wicker basket, brown leather saddle, and handlebar grips.

Here is a close-up of the twined rack connector. I thought that this was a failry subtle detail, but to my surprise, several people commented on it while examining my bicycle.

My most daring use of twine thus far, has been the twining of my Shimano Nexus shifter. My reasons for doing this were two-fold: I thought that the big rubber shifter was too modern for the aesthetic of the Pashley's handlebars, and I also found it unpleasant to the touch, especially in the sumemr heat. Covered with shellacked twine, the shifter blends in better and is more comfortable for me to use, as the twine provides a better grip than the rubber. There was some concern regarding whether the twine would adhere well to the rubber, but this was not an issue; just wrap it tightly prior to shellacking.

Of course, once you do this to your shifter, there is no going back: the shellac will disfigure the rubber if you ever decide to remove the twine and you will need to buy a new one. Twine at your own risk!

For more twining ideas, Rivendell has some nice pictures and instructions, as well as hemp twine for sale. Also have a look at this marvelous twined water-bottle pictured on The Epicurean Cyclist.
Read More
Posted in DIY, grips | No comments

Friday, July 10, 2009

Da Vinci Bicycle... Or Not

Posted on 9:41 AM by dvdsvdsdv
Forget the Fendi Bicycle. It has been proposed that the first Italian designer bike was invented by Leonardo Da Vinci. The wooden construction above is a model "Da Vinci Bicycle", from an exhibition of the artist's inventions.

A bicycle-like sketch was discovered in 1974 during the restoration of the Codex Atlanticus and attributed to Da Vinci. Conferences were held about this discovery; academic articles written... until 1997, when the sketch was proven to be a 20th century forgery.

Okay, so Leonardo Da Vinci did not really invent the bicycle. But it's a romantic idea.
Read More
Posted in DIY, social commentary | No comments

Wednesday, July 8, 2009

Anti-Theft Cozy

Posted on 8:27 AM by dvdsvdsdv
Spotted around Harvard Square, this road bike is sporting a green knitted U-lock cover!

Knitting a "cozy" for your U-Lock is a fabulous and pretty hilarious idea. But if I think about it, there might be more to it. The hand-knitted cover humanizes the owner of the bicycle. It calls attention to the deeply personal anxieties over the safety of our cherished belongings. If cruel acts are possible because the perpetrator depersonalises the victim, then perhaps this piece of knitted handywork will disrupt that process by evoking empathy.

Edited to add: After searching for "knitted U-Lock cover" on google, I've discovered this post from Bikes and the City. Bi-coastal trend?
Read More
Posted in Boston, DIY, social commentary | No comments

Monday, July 6, 2009

M is for Mmmmmm

Posted on 7:10 AM by dvdsvdsdv
Well, Marianne's lover has been named. His name is Miles. "M" for short. After the James Bond character. The Co-Habitant likes M so much, that he's made him a name-tag. Behold:

"M" is for "make it yourself!" Ribbon. Oil Crayon. Old canvas bag that you're not worried about ruining.


"M" is for "Men's frames can also be beautiful!" I just love the clean, elegant lines of this bicycle. And the silver is a surprisingly warm colour, with a touch of champagne and sage in it.


"M" is for "Makes it easier to see in the dark!" No lights yet. Any suggestions for a good lighting system for road bikes are welcome.


"M" is for "Mmmmmm!"
Read More
Posted in Co-Habitant, diamond frame, DIY, Motobecane, Myles | No comments

Friday, July 3, 2009

Adventures with Shellac: Olive Handlebar Tape

Posted on 3:58 AM by dvdsvdsdv
Okay: So say, hypothetically, you acquire a Mixte. It is a beautiful pale marine-blue. And it comes with drop handlebars. And after reading an article by Sheldon Brown, you decide to give the drop bars a try rather than immediately replace them. Now, keeping this entirely hypothetical scenario in mind, what kind of tape would you get for said dropbars, if the awful rubbery stuff they are covered with will not do?

It is surprisingly tricky to complement pale marine-blue. I think that black deadens the colour, but brown tape can have a look of medical bandages to it that I don't like.

[image from rivbike.com]

Inspired by the above picture from Rivendell, I thought that olive tape would look perfect. It is a neutral colour that seems to tie together the blue frame with the brown saddle and accessories. And it has a classic touring look to it, evoking images of the countryside.

Olive handlebar tape is pretty much impossible to find. But colour-theory tells us, that applying amber shellac to standard green tape would be akin to mixing brown into green, producing an olive drab colour. Let's hope it works out that way!

Dreadful rubberized wraps after surgical removal. Ewww!

Naked handlebar. Mmmm!

Handlebar wrapped in green Tressostar Cloth Tape. This is a standard green, looks very Christmasy. Definitely not the colour we hoped to end up with, but we have faith in colour theory. I should mention, that of course it was the Co-Habitant who did all the work, since I am still in Europe. He tells me that wrapping handlebar tape is not the easiest thing to do. So this project is definitely one step up from cork grip installation.

And now, voila: The green tape covered with amber shellac. This is what it looks like before the shellac sinks into the cloth and dries. I posted the above pic on bikeforums in response to someone's question about shellacking green tape, and the nice people there promptly told me that my tape looks like sh!1 : )

Here is the colour after it soaks in a bit. It becomes a true olive drab, exactly what I wanted. Hurray for colour theory! (Oh and that enormous reflector will soon be gone.)

Of course, this is all entirely hypothetical. Mixte? What Mixte!
Read More
Posted in DIY, grips, mixte, Motobecane, vintage | No comments

Thursday, July 2, 2009

Creative Encounters: Bicycle "Self-help" Workshop

Posted on 5:25 AM by dvdsvdsdv
Located in the WUK center for workshops and culture in Vienna, the Fahrrad Selbsthilfe Werkstatt (Bicycle Self-Help Workshop), functions on a similar premise as co-ops like Bikes Not Bombs in the US: You pay a small fee for the afternoon, and one of the mechanics on staff helps you fix your bicycle or assemble an entirely new one using the parts available at the shop.

But the unique thing about the Fahrrad Selbsthilfe Werkstatt, is that here you are likely to see bicycles like this:

or like this:

or like this!

The workshop specialises in tall bikes and various other remarkable constructions, the likes of which you are not likely to see every day.

Though the floorspace is small, they make excellent use of the extremely high ceilings. Rows upon rows of frames, wheels, and partially assembled bicycles of different vintages, hang suspended above the visitors' heads. The resultant arrangements are quite beautiful.

Wheels and a station with tools...

forks...

cranks and pedals...

small parts...

Of course the majority of those who come in, are looking for help with "normal" bikes and are not assembling the sort of eccentric constructions shown above.

The mechanics are very helpful, and the atmosphere is mellow and friendly. A wonderful place to be, even just to watch. If you are a cycling enthusiast visiting Vienna, you will enjoy a visit to the Fahrrad Selbsthilfe Werkstatt.

Read More
Posted in DIY, tools, Vienna, vintage | No comments
Older Posts Home
Subscribe to: Posts (Atom)

Popular Posts

  • Profiles of Traditional Bicycle Manufacturers
    {This post is now a Page }
  • Review of "Marianne": Motobecane Mirage Mixte
    I. THE BICYCLE: Marianne is a 1981 Motobecane Mirage Mixte in a shimmery aquamarine colour. She is a 21" frame, 12-speed, with original...
  • New Year, New Look, and Change of Contact Info
    Happy 2010 everyone! It's always nice to do something new in the new year, and so you may have noticed that I've made some minor cha...
  • DZnuts for the Ladies?
    One discovery I have made in my attempts to battle roadbike discomforts is a product called DZnuts . This is a chamois cream that promises t...
  • Critical Mass Chic? -- Austria
    I stopped by at the meeting point of the Critical Mass "Bare as You Dare" bike ride in Vienna today. There was a conference at wor...
  • Idyllic Trail Through the Charles River Reservation
    When most people ride on the Charles River trail, they keep to the popular loop around Boston and Cambridge. However, the trail goes on (and...
  • Creative Encounters: Bicycle "Self-help" Workshop
    Located in the WUK center for workshops and culture in Vienna, the Fahrrad Selbsthilfe Werkstatt (Bicycle Self-Help Workshop), functions o...
  • Can We "Ride Away" from Marketing?
    [image from goldenoldy.com] An article appeared today on Copenhagen Cycle Chic  discussing the ironies of advertising "cycle chic"...
  • Netted Dress Guards
    I love the look of netted dress guards, so while I am in the EU, I decided to stock up. Here are some lovely options from reliable online se...
  • Bicycles in Vienna, Part IV: Mixte Galore
    Continuing with the theme of the previous post, I am showing off some Mixtes that I've been encountering around the neighborhood. After ...

Categories

  • ANT
  • art
  • bags
  • basket
  • beginners
  • bicycle events
  • bicycle industry
  • bicycle reviews
  • bike friends
  • bike shopping
  • blog development
  • Boston
  • Brompton
  • Brooks
  • Cape Cod
  • cats
  • clothing
  • Co-Habitant
  • coaster brake
  • comfort
  • countryside
  • diamond frame
  • DIY
  • DL-1
  • dress guards
  • drop bars
  • Eustacia Vye
  • fashion industry
  • fenders
  • films
  • flowers
  • food
  • framebuilding
  • Gazelle
  • gender
  • give-away
  • grips
  • handlebars
  • holidays
  • Italian bicycles
  • lights
  • local bike shops
  • loop frame
  • Lucy 3-Speed
  • lugs
  • Marianne
  • mixte
  • Motobecane
  • Myles
  • night time cycling
  • Pashley
  • product reviews
  • rain
  • Raleigh
  • restoration
  • Rivendell
  • roadcycling
  • rod brakes
  • Rodney
  • Royal H
  • Royal H. Mixte
  • saddles
  • shop visits
  • silliness
  • skirt
  • social commentary
  • somervillain
  • summer cycling
  • sun and heat
  • tandem
  • technique
  • test rides
  • tires
  • tools
  • traffic
  • trails
  • travel
  • urban cycling
  • Velouria
  • Vienna
  • vintage
  • winter cycling

Blog Archive

  • ▼  2010 (8)
    • ▼  January (8)
      • Review of "Spoke Count" at the Chorus Gallery
      • Say It Loud: We Like Them Plowed!
      • What's Green and Lugged and Not a Bicycle? An Unex...
      • Woolen Socks and Tights: Winter Cycling Delights
      • Fun in the Winter Sun
      • Little Green Bike: Trying the Raleigh Twenty
      • Parka Time?
      • New Year, New Look, and Change of Contact Info
  • ►  2009 (182)
    • ►  December (22)
    • ►  November (20)
    • ►  October (27)
    • ►  September (21)
    • ►  August (20)
    • ►  July (21)
    • ►  June (23)
    • ►  May (19)
    • ►  April (9)
Powered by Blogger.

About Me

dvdsvdsdv
View my complete profile